Monday, December 10, 2012

It's Here! It's Here!

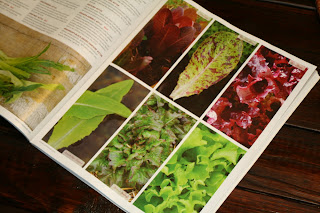
Here it is -- the 2013 Baker Creek seed catalog!  I could hardly contain my excitement when I discovered it in my mailbox. 

I could hardly wait to settle in and read all about the amazing seed varieties it offers.  But, I chose to delay gratification by forcing myself to clean the house, get Little Boy down for a nap, turn on some quiet music, brew a warm cup of tea, light my Christmas-scented candle, grab a blanket, settle in on the couch next to the Christmas tree with my highlighter, Post-it notes, pen, and THE catalog.  Seriously, doesn't that sound divine? 

This is no ordinary seed catalog.  This is THE seed catalog.  Run by the extraordinary Gettle family, Baker Creek Heirloom Seeds offers "1,400 varieties of vegetables, flowers, and herbs -- the largest selection of heirloom varieties in the USA."  They've committed themselves to producing non-hybrid, non-GMO, non-treated, and non-patented seeds.  In other words, they're fighting back against the big corporation's attempts to control our seed supply.  This company also works "extensively to supply free seeds to many of the world's poorest countries, as well as here at home in school gardens and other educational projects." 
AND, this 350-page, full-color catalog contains such beautiful photos that it's coffee-table worthy.


AND, the company is located in Mansfield, Missouri.  What's so great about that?  Well, they grow their many varities right there in Missouri.  In choosing seed, it's a good idea to buy seed produced close to home because it's  more likely to grow well in your area.

In a location where backyard homesteading is not the norm, where I have to drive my own recycling to the processing plant, where organic, locally-grown produce is not to be found in our supermarkets, where the ladies at the supermarket look at me weird when they see my re-usable bags,  . . . it's so nice to finally catch a break!  We have the largest selection of heirloom seed varieties in the US, right up the road in Missouri!

This beautiful and FREE catalog can be yours, too.  All you have to do is request one! 
Click here to visit their website and get your own! 

Sunday, December 9, 2012

Eating in Season: Butternut Squash Lasagna

This blonde lasagna makes use of butternut squash, which is locally in season, and can be prepared ahead of time and just popped into the oven before dinnertime (which is my second favorite way to do dinner -- 1st favorite is to use the CrockPot, of course).  Also, because the squash is pureed, you won't have to endure the "Mom,-what's-this?" question, as a little waves around his fork wielding an unidentified chunk of something.  (If you have a texture weirdo at your table, you know what I'm talking about.)


 Ingredients:
1 Tbs. olive oil
1 butternut squash, peeled, seeded, and cut into 1" cubes
1/2 c. water
4 Tbs. butter
1/3 c. flour
4 c. whole milk
pinch of nutmeg
12 no-boil lasagna noodles
2.5 c. shredded mozzarella
1/3 c. grated Paremesan

Heat the oil in a large skillet.  Add the cubed squash and toss to coat.  Sprinkle with salt and pepper.  Pour in water, cover, and simmer over medium heat until the squash is tender, 15-20 minutes.  Mash or food process the squash to desired consistency.  Season with more salt and pepper to taste.


Melt the butter in a saucepan over medium heat.  Add flour and whisk for 1 minute. Gradually whisk in milk.  Bring to a low boil over medium-high heat.  Reduce heat to medium and simmer until sauce thickens, whisking often, about 5 minutes.  Add the nutmeg and more salt and pepper to taste.


Preheat oven to 375 degrees.  Spray a 13"x9" baking dish with non-stick spray.  Spread 3/4 c. of sauce over baking dish.  Cover the bottom of pan with one layer of noodles.  Spread half the squash puree over the noodles.  Sprinkle with 1/2 c. of mozzarella cheese.  Drizzle with 1/2 c. of sauce.  Repeat layering once more, finishing with a layer of noodles covered only by white sauce.

Tightly cover with foil and bake for 40 minutes.  Remove cover, sprinkle with the remaining mozzarella and Parmesan, and continue baking until the sauce bubbles and the top is golden, 15-20 minutes.  Let lasagna stand for 15 minutes before serving.

I was a HUGE fan of this recipe! 


Thanks to Mother Earth News for this and many more recipes for eating in season.

Saturday, December 8, 2012

Blood Draw Drama

We attempted the blood draw needed for the goat pregnancy testing again today.  And, we failed again today.  I really don't get it.  John did a great job straddling and restraining her, holding her head at a 30 degree angle. 

Here you can see Honey's neck, shaved to make it easier to see the vein.

I applied pressure to the vein until it popped up, inserted the needle holder into the vein followed by the vacutainer tube.  That's when the blood should flow quickly into the tube, but it just didn't happen. We tried it several times, following the steps we'd seen in the video.

For her part, Honey was pretty cooperative.  She mostly just took it as we poked and prodded.  Bless her heart!  Once we realized that we were doing it exactly the way we thought was right but the blood just wasn't flowing, we knew the time had come for us to throw in the towel.

Plan B is to see if we can get a vet to come out and draw the blood for us and maybe teach us how to do it.  Plan C (and I really hope it doesn't come to this) will be just to wait it out.  We'll either have babies and milk in the spring or we won't.  While lots of big farms routinely go this route, it's not nearly as feasible for a small farm like ours.  If a few goats in a big operation don't wind up pregnant, it's not a big deal on a farm with a large herd.  When we've only attempted to breed two goats, though, even one of them not being pregnant will have big repercussions for our expected milk production next year.  If we find out now that one or both of them aren't bred, we still have a little time before breeding season is over to try again.  The "wait and see" approach obviously doesn't allow for this.

Anyone know a local vet that will make house calls?

Friday, December 7, 2012

Free Gift Wrap!

What could be better than free wrapping paper for the holidays?  How about gift wrap that allows you to reuse something you would otherwise throw away?  Or how about gift wrap that can be recycled once gifts have all been unwrapped?

Sounds good, huh?
Last year, we wrapped in newspaper, which was fun.  This year, I decided to use the packing paper that fills every package we get from Amazon (and because we live where it's hard to do much local Christmas shopping, we get A LOT of Amazon boxes around the holidays.)  The ribbons are salvaged from gifts we've received in years past, and the gift tags are made out of Christmas cards we received last year, cut out with fun scrapbooking scissors. 


They really pack so much of that paper into these boxes!  The boxes themselves make a great kill mulch outside.  If you have an area that you'd like to plant in the spring and need to kill the grass, lay down a bunch of cardboard now, hose it down, and you'll be ready to go come spring.

Oh, and since it's apparently the thing to do to post a pic of your tree online, here's ours.  John says it looks like it has hair!  ;)  This is "Momma's tree."  I decorate it, evenly spacing the ornaments that are all of one color family.  I LOVE my tree.  If I were choosing decorations again, I probably wouldn't go with these, but I'm not about to spend $ on new tree decorations.  It's the lights I enjoy most anyway.  I like to sit in its glow in the early morning with a cup of coffee.  Quiet Christmas tree moments are the best!

Upstairs, we have the kids' tree.  They decorate it entirely on their own, and it's full of the more colorful ornaments, including, of course, all the awesome handmade ones they bring home from school each year.  Of course, there are no ornaments at the top because they can't reach that high!  But, I love that about it.  They want their ornaments to be where they can see them anyway!  So, the downstairs tree may be classically beautful, but it's the upstairs tree that tells the stories.

Thursday, December 6, 2012

Complete and Utter Failure

Well, this is the only photo I was able to get of yesterday's attempted "neck bleed."


Let's just get this out of the way.  We failed.  We TOTALLY failed.  Honey was not decapitated (as she had been in my nightmare), but she does have a bare patch on her neck and wounds from several needle pricks.  :(

Knowing that I would have to do this as soon as John got home from work, I'd been psyching myself up for it all afternoon.  I read and reread the directions. Somehow, though, it's just hard to visualize exactly how it should be done when you're translating from written directions.

Once we'd gathered all our materials and discussed our game plan, we had no other excuse to put it off, so we had to commence the "neck bleed" attempt.
While John restrained Honey, I shaved a patch on her neck so that I could find her jugular vein.  Then, I attempted to draw the blood.  She was unamused by it all and was very jumpy, as was I.  Long story short, we had a crucial step of the process wrong and never got the blood sample. 

We gave up (hopefully before we traumatized her too terribly), came inside, and I promptly had an emotional breakdown.  What can I say?  I love my goats.
 I'd worked myself all up to be prepared to jab them in the neck in order to get that much-needed blood sample.  But, to jab my favorite goat in the neck multiple times and still not get the sample was just too much for me.

Anyway, once I'd settled down a bit and realized that we were going to have to figure out how to do this, I did a little searching and came up with this VERY helpful video.  Watch it if you're interested in seeing exactly how it's done. 

It was very obvious to me as I watched the video what step I'd been doing wrong, so I'm hoping for a better result when we try again this afternoon. 

Wednesday, December 5, 2012

Ahhh!!! Testing Kit is Here!

Monday, as I opened up this package, I could feel my knees getting weak as the big bundle of needles tumbled out.  It's here:  the pregnancy testing kit that will let us know whether or not Copper got the job done this fall and we've got little goats on the way.  We've got the clippers, the surgical gloves, the needles, and the specimen tubes.  Now, all that's left to do is actually jab the goats in the jugular and draw that blood.  Ahhhhhh!! 

Here are the directions.  Notice the title: "How to Neck Bleed a Goat."  Uggghhhh.

Well, Monday night, Girl 2 had a Christmas performance at school (she did great!), last night I had to make a trip to town, so we've planned to do this TODAY!

Knowing what today would hold, I had a HORRIBLE nightmare last night.  I'll spare you the details, but just know that it ended with a decapitated goat and me crumpled on the ground sobbing uncontrollably.  Yes, it was disturbing.  Let's hope this afternoon's "neck bleeding" goes much better.

Check back tomorrow to see we (both goats and humans) fared.  :(

Tuesday, December 4, 2012

December Cold Frame

Well, it's now December, and I couldn't be more pleased with how our first attempt at a cold frame is going!

Here's a peek inside.  From left to right, we've got spinach, kale, red leaf lettuce, green leaf lettuce, and mini-Romaine lettuce.

I love being able to go out and snip some lettuce before a meal.  I also love that because the plastic holds in moisture, I only have to water it once a week. 

I wonder how much longer we'll continue to have fresh greens?