I love getting feedback on my blog. It lets me know that I'm not just doing this for myself. Feedback like "I love this new laundry detergent. Thanks for sharing!" makes my day. "I made the Spicy Black Bean Soup, and my family loved it!" puts a smile on my face.
"Your blog makes me feel lazy!" however, is not on the list of my favorite comments (you know who you are ;). I definitely don't set out to make anyone feel badly about herself. Besides, you guys are busy, too, you just may not go through your day with a camera strapped to your neck and thinking about how you could describe what you're doing in a step-by-step process. ;)
But, an acquaintance posited seriously the other day, "How do you find the time?" My answer is that we make time for the things that we love to do. I mean, isn't it true? If it's of value to us, we'll find the time to work it in.
So, I choose to find time to make fresh juice every morning, make my own soap, process my own milk, and so on. But, just to remind you that I'm no superwoman, here's a list of things I haven't made time for lately:
1. going out for date night (I really do want to have date night with my husband, but we haven't had much luck finding a sitter who will also milk the goat ;) Suggestions?)
2. reading a novel (I love to read, but it's hard to find the time to sit down with books other than my organic gardening or cheese making books.)
3. making my kids' lunches for school (I know. I know. Shame on me. On the days they have taken their lunches lately, it's been Lunchables thrown into the lunchboxes. I do resolve, though, to do better about sending wholesome food to school with my kids next year. It hardly seems worth the effort right now, since they have only one day of school left for the year.)
4. watching a show or movie during daylight hours
5. finishing my deep cleaning (I saved my bedroom and bathroom for last and have yet to do it. I REALLY dislike cleaning, and I lost the momentum.)
6. getting my hair done (I've got a certain four-letter-word shining brightly at my scalp and am in dire need of a trim.)
7. painting my nails (it may seem frivolous, but I love to wear my nails painted. But, since I've had to cut them short so as not to pinch or scratch Razz during milking, it hardly seems worth taking the time to paint the little stubs.)
8. taking the rabbit for walks (I know. I know. I really should do this everyday. She is, after all, continuing to get bigger! I'm starting to think we're living some kind of modern fairy tale about the rabbit that wouldn't stop growing and eventually took over the farm).
9. sleeping in (that alarm goes off at 5:30am, every day of the week)
10. getting my phone fixed (I dropped it on a field trip last week and shattered the screen.)
Okay. There. A list of 10 things I haven't done. I could keep going, but then I would start to feel lazy. ;)
Saturday, May 12, 2012

Friday, May 11, 2012
Ever Met a Cabbage Looper?
For the traditional gardener, early detection may not be so important. Notice a pretty advanced pest invasion? Put on the mask and douse the garden in Sevin dust. But, we organic gardeners are playing a different game altogether. I'm pretty sure if there were such a thing as the 10 Commandments of Organic Gardening, this one would be somewhere high on the list:
Know Thy Garden
I water my garden by hand most every morning, rather than using a sprinkler (though I do think this is for the best, it's not entirely by choice as I don't currently have a working sprinkler). Then, while the kids are playing in the evening, I take a walk through again, just looking and plucking weeds as I go. So, when I saw the tiny holes in the broccoli leaf that I knew weren't there that morning, I turned it over to discover this guy.

Yep, he's a cabbage looper. This tiny, green caterpillar eats leaves of cabbage-family crops for dinner.

On this leaf, he's not so difficult to spot.

But, on this lettuce, he's well camouflaged. Can you spot him?
To repel loopers, use a garlic spray. And, when you spot loopers, handpick them and crush eggs.

Isn't this lettuce lovely? It's the aptly named Little Gem, a Romaine variety. It's almost too beautiful to eat! Maybe the loopers agree -- they've left this variety untouched, so far.
Thursday, May 10, 2012
I'm Expecting . . .
Yep, I'm expecting . . . God to do something pretty amazing in my local community. (Now, don't be mad about the shameless ploy to get you to click on the link. I just really wanted everyone to hear about this!)
Here's a riddle for you: Who is better poised to minister to the needs of a community than a local church?
The answer: THE local church, meaning not one community church but ALL of them, working together toward a common goal. I am so proud to be a part of The Bethany Project, a new mission, uniting local churches to minister to the needs of our community. I love to see churches working together to accomplish God's commandment to love Him by loving others and feel blessed to be serving as our church's representative.
The Bethany Project, founded in honor of Bethany Roebuck Etheridge, seeks to provide love, hope, and care to our community through various missions. First, we are hosting Hello Baby, which will be held on June 2. On this day, anyone in need can come to First Baptist Church and stock up on baby items free of charge. Donations to stock the event are being accepted now at all area churches. Items we are collecting include the following:
new or gently used children's clothing, sizes birth-5T, diapers, diaper bags, baby wipes, baby shampoo, baby powder, baby lotion, etc, baby blankets, crib sheets, baby laundry detergent, baby bottles (basically anything "baby.")
If you live locally and would like to donate, you can drop off items at a participating church or drop them on my doorstep. :) We are accepting donations through May 27th. If you live further away but would like to be a part of what's going on here, you could make a monetary donation that I could use to fill in the gaps once I see what we need more of before June 2.
Later this year, The Bethany Project will be hosting missions to provide school supplies and coats to those in need.
Now, as for the title of this post. . . (With my right hand in the air,) I do hereby solemnly swear not to title any future blog post with this title unless it bears the exciting news which you would expect to discover therein. ;)
Here's a riddle for you: Who is better poised to minister to the needs of a community than a local church?
The answer: THE local church, meaning not one community church but ALL of them, working together toward a common goal. I am so proud to be a part of The Bethany Project, a new mission, uniting local churches to minister to the needs of our community. I love to see churches working together to accomplish God's commandment to love Him by loving others and feel blessed to be serving as our church's representative.
The Bethany Project, founded in honor of Bethany Roebuck Etheridge, seeks to provide love, hope, and care to our community through various missions. First, we are hosting Hello Baby, which will be held on June 2. On this day, anyone in need can come to First Baptist Church and stock up on baby items free of charge. Donations to stock the event are being accepted now at all area churches. Items we are collecting include the following:
new or gently used children's clothing, sizes birth-5T, diapers, diaper bags, baby wipes, baby shampoo, baby powder, baby lotion, etc, baby blankets, crib sheets, baby laundry detergent, baby bottles (basically anything "baby.")
If you live locally and would like to donate, you can drop off items at a participating church or drop them on my doorstep. :) We are accepting donations through May 27th. If you live further away but would like to be a part of what's going on here, you could make a monetary donation that I could use to fill in the gaps once I see what we need more of before June 2.
Later this year, The Bethany Project will be hosting missions to provide school supplies and coats to those in need.
Now, as for the title of this post. . . (With my right hand in the air,) I do hereby solemnly swear not to title any future blog post with this title unless it bears the exciting news which you would expect to discover therein. ;)
Wednesday, May 9, 2012
Roasted Chickpeas
John and I are both munchers. When we finally relax in the evening and decide to snack, we love that repetitive motion of bowl to mouth, but we don't always make the best decisions about what to snack on.
I stumbled across this recipe for roasted chickpeas and decided to give it a try with some leftover chickpeas I had on hand from making hummus. (For those who are confused, remember that chickpeas and garbanzo beans are the same thing. The two names are used interchangeably, so be aware of that as you seek them out at the grocery store.)
The end result is a crunchy, spicy, good-for-you snack -- a great choice for those evening munchies!
You'll need the following:
1 can chickpeas (or the equivalent amount in slow cooked beans)
cooking spray (Check Pinterest for the DIY version of this, if you haven't already pinned it :)
1/2 heaping Tbs. cajun seasoning
1/2 tsp. garlic powder
1/2 tsp. onion powder
cayenne powder, to taste

Drain, rinse, and dry chickpeas (the drier you can get them, the faster they'll cook). Cover a rimmed baking sheet with foil and spread chickpeas in a single layer.
Spray the top of beans with cooking spray and sprinkle the seasonings over the beans. Shake pan to evenly distribute seasonings.
Place pan on lowest rack of 350 degree oven. Check every 15 minutes and shake the pan. Cook until beans are browned and crispy. Mine took 45 minutes.

Munch away! Or store in an airtight container. I found these are really best the first day. After that, they get a bit stale.
Tuesday, May 8, 2012
If Momma Ain't Happy . . .
Around here, the motto for lunch and dinner is "You get what you get, and you don't throw a fit." In other words, Momma decides what's on your plate. But, at breakfast I am a short order cook. Everyone gets to choose. The problem with this is that Girl 1 wants to sleep in and then announce that she wants eggs, which take awhile to prepare. Girl 2, who is not a morning person, usually answers my "Good morning, sweetie! What'll it be for breakfast?" with a grunt. And Little Boy sleeps until breakfast is basically all cleaned up, so I've had to decide on something for him. Inevitable, it's the wrong thing, and he starts his day with a fit or disapproval.
So, all of this is going on, but throw in that I'm now trying to pasteurize milk in the midst of breakfast prep, and I could see that the whole process needed a revamping. John actually came up with the idea of taking breakfast orders the night before. It was perfect! Now, Girl 1 can sleep in and her eggs will be waiting for her when she wakes up. Girl 2 can grunt away as she eats the breakfast of her choosing. And, Little Boy will greet his breakfast plate with a smile when he decides to finally get up.

So, I printed out two copies of this document and slid them back to back into a clear page protector and clipped it to the fridge.

I can use a wet erase marker to record orders; and, because it has a front and back, I only have to clean it off every-other day.
So far, it seems to be working really well for everyone. The kids think it's fun to give Momma their orders, and I love being able to work in the quiet kitchen and get everything to the table before the morning chaos ensues. I know that a sit-down family breakfast is not something that everyone gets to enjoy, and I don't take it for granted. But, I'm definitely thankful for a prep routine that is less stressful for me.
If you like this solution and would like a copy of this file to customize for your family, just comment and give me your email address. I'll send it to you as an attachment. :)
Monday, May 7, 2012
DIY Dish Detergent
I'm declaring victory! I've finally found a DIY dish detergent that works well with our machine and water. This has been no small feat. I think I've tried 5 different combinations over the past several months. All past trials have resulted in various degrees of film left on the dishes. I recently discovered (Thank you, Sears repairman) that we have high amounts of calcium in our water that is causing build-up on our dishes as well as on the inside of our machine. Most DIY detergent solutions just aren't equipped to deal with that much calcium.
And, it should be said, I run my dishwasher A LOT! We don't use paper plates; we all eat breakfast and dinner here nearly everyday; 2 (sometimes 3) of us eat lunch here daily; our juicer parts take up significant space on the top shelf; and I'm not a fan of handwashing when I have a machine that will do it for me. All of this means that I run our dishwasher at least twice a day. So, having a dishwasher that does its job and does it well is a priority.
This recipe is actually my own combination of several recipes I've tried. I've been using it now for about 2 weeks and think I've now got a good handle on the ideal proportions, so I'm ready to share it with you!

Here are the ingredients. (Yes, that's rice you see.) You'll notice that it includes Cascade Complete, which is not a green solution. If you are looking to go entirely green with your detergent, this is not the solution for you. However, I'm convinced that the green DIY solutions just aren't gonna cut it for my water. This recipe allows me to use significantly less Cascade than if it were my primary detergent and, in the process, saves me lots of green (cash, that is).
I make a small batch because I have a small container and because I only have to use 1 Tbs. per load. After all, this mixture will provide me with detergent enough for 64 loads.
Mix together the following:
1 c. Arm & Hammer Super Washing Soda
1 c. Borax
1 c. Cascade Complete
1/2 c. Lemi-Shine
1/2 c. rice
The skinny on the ingredients:
The Washing Soda and Borax naturally stretch the cleaning power of the Cascade Complete. I always have these 2 ingredients on hand because I also use them in my DIY Laundy Detergent. The Lemi-Shine was recommended by the aforementioned Sears repairman and helps keep that yucky film off the glasses. All of these ingredients are likely to solidify into one giant mass in my container, if left to their own devices. The rice serves to absorb excess moisture and keep the mixture scoopable. It's not a problem to have it in the dishwasher as it washes away during the cycle.

Mix it all together in container; throw in a Tbs. scoop and a label; and you're ready to wash.
The skinny on the savings:
At 20 cents per load, Consumer Reports considers Cascade Complete powder a real value. After all, if you're using some of the new, trendy gel packs, you're paying more like 40 cents per load.
This above recipe, however, comes out at just over 6 cents per load, a value unheard of on the supermarket shelf.
If you've never had problems with film, I'd give this mixture a try without the Lemi-Shine (which is the most expensive ingredient), and you'll save even more. But, for those of you who, like me, are plagued with super-calcified water, give this recipe a try. And, please report back. I'd love to know how it worked for you!
Sunday, May 6, 2012
1st Attempt at Goat Cheese!
As I've now got goat milk coming out my ears (figurately speaking, thank goodness, now that I've mastered a better aim at the milk pail ;), I thought it was time to try to make some cheese!
My amazing Home Cheese Making book has over 75 recipes, but I wanted to start easy with a soft cheese and also first try a cheese that is specifically made with goat milk.
I decided to begin with Chevre (as this is a French word, it is intended to have a doo-hicky over the first "e" but I can't for the life of me figure out how to do that in Blogger. Oh, well. It is pronounced "Shev"). Chevre is French for "goat." This spreadable cheese can be used many different ways, including as a substitute for cream cheese or ricotta in cooking. It's really remarkably simple to make! Even if you don't have a goat in your backyard, you, too, can make a cheese. Even store-bought milk can be used to make most cheeses (so long as it's not ultra-pasteurized. Click here to see why.) Now, harder cheeses take more equipment and have to age for long periods of time. I may work up to those later; but, for now, I thought I'd just show you how simple it is to make a soft cheese.

Bring one gallon of pasteurized milk to 86 degrees. Then, remove from heat and thoroughly mix in a packet of Chevre culture. (I bought my culture from Cultures for Health, which a fellow blogger recommended. I love the Cultures website. They have a good selection and a low, flat rate for shipping.) Cover the pot and leave mixture to culture for 12 hours at approximately 72 degrees.

After 12 hours, the cheese should look like yogurt, solid when tipped but still relatively soft. Here, you can see from the ring around the pot that the whey has separated from the curd.

Place a piece of butter muslin (it has a tighter weave than cheesecloth, is used with most soft cheese recipes, is reusable, and is available from Cultures for Health for $2.99) in a colander in the sink.

With a slotted spoon, gently spoon the Chevre into the cloth.

Gather the corners of the cloth up and tie knots to secure. Hang the cloth over a bowl or the sink to strain. (I installed a hook over my kitchen sink for this purpose, but you could also hang it from a cabinet knob.) Allow it to strain for 6-12 hours. The longer it strains, the thicker it will be. I let mine strain overnight and got a consistency similar to cream cheese.
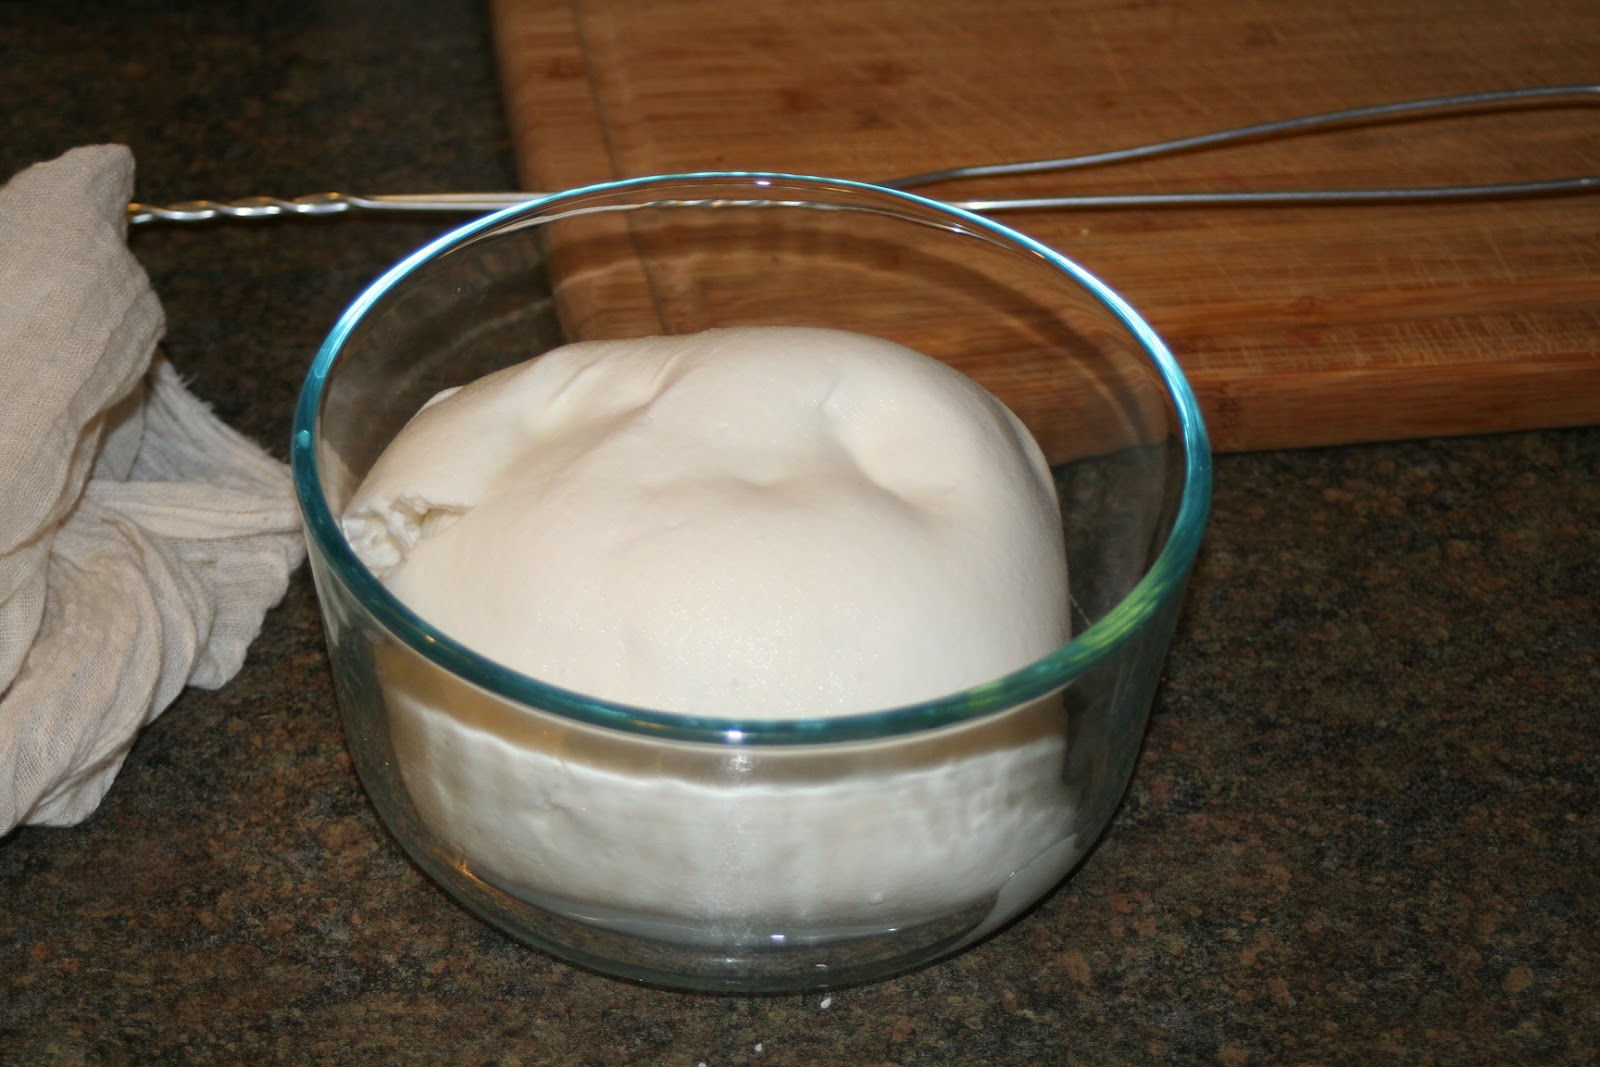
It came out of the muslin looking like this.

Then, I mashed it up and put it in the fridge. I wasn't sure whether I was going to add anything to it, but I wanted to give it a first taste test after it had had time to chill.

In its pure form, it would've been a great substitute for ricotta. I, however, wanted to use this first batch as a cracker spread, so I stirred in some cheese salt and Herbs de Provence for flavor. Delicious! It should stay fresh in the fridge for up to a week.
Now, if I could just get my yogurt to set up. . . .
Subscribe to:
Posts (Atom)